Sewing Class!
I find some classes and subjects difficult to find time for. Not that they take so much time out of the day, but because they involve so much planning and prep work. Sometimes we take advantage of outside classes to satisfy these subjects (like PE, ballet, and such), sometimes we decide they aren't really critical to the school day at this point (like speech and foreign language), and sometimes I squeeze it in because I feel we must (like nature study, art, etc.)
Back in the fall my mom proposed coming out and teaching a sewing class for my kids once a month, and wondered if that would interest me. Hmmmmm. How long did I need to think before answering that one? I think I said, "yes" before she finished offering. This is one of those subjects that takes more time, energy, and knowledge than I have to put together and consistently execute for my kids.
My parents wintered down south and recently returned, ready to jump into our sewing classes. The first class far exceeded my expectations, even as well as I know my mom. I wanted to share the lesson concepts and the craft we did in case anyone else would like to start something along these lines. In the process, you will also get some of my mom's amazing frugal ideas . . .
She opened by talking about different types of fabric -- woven, knit, etc. She asked for other ideas and I was thrilled when Blake mentioned felt and could even explain the two different processes to make felt (thanks to a field trip to a sheep farm and wool shop a year and a half ago -- See? They do actually listen and learn on those trips!)
We also talked about some types of stitches, string vs. thread, and went over the project of the day -- Cactus Pincushions. These were great beginner projects and would be the perfect end to a unit study on deserts, a southwest state, or cacti (not that we were doing any of those things, just looking for different applications).
 Brooke tracing with the finished project sample on display
 Cut out the patterns for the shapes. Free hand draw a cactus (about 5 1/2 inches high) and two rectangles, one about 1-1/4" x 5" (this will be used to cut out another heavy cardstock triangle for each project) and the other about 3" x 5-3/4" (this will be traced on the tan felt).

Trace the patterns. The cactus pattern gets traced twice onto green felt, the large rectangle onto tan felt, and the smaller rectangle onto more cardstock.

Sew cactus halves together. After cutting out the two cactus halves, they had to sew them together using a whip stitch all around the edge. This is one of the easiest stitches, that even a four year old can often accomplish with a little direction to get started. Do not sew the bottom closed.

Stuff cactus. ** Frugal tip ** My mom saves the cotton from pill and vitamin bottles! She has quite a bag full and we used this for our stuffing! The stuffing can be started when you are still only 2/3 of the way around with the stitching. That makes it a little easier to get into the arm of the cactus and all the way to the top. Stuff it firmly, but not so hard that you break the felt. We did have to touch up a couple spots from over-zealous stuffing. A pen or pencil can help to gently stuff where fingers can't quite reach.
 Sew the tan felt into a cylinder. After completing the cactus, now do another whip stitch connecting the two shorter sides of the felt rectangle.
 Gathering stitch. Then they put a running stitch along one opening of the brown tube. Put the cactus into the tube and gather/tighten the stitch like a draw string and tie in place. Then sew around the base of the cactus (whip stitch), securing it to the tan felt.
 Make the base. Once the base and cactus are connected, you flip the base right side out (like a skirt on the bottom of the cactus). Take the cardboard rectangle and shape it into a circle. Put this inside the tan cylinder to help it hold the circular shape. Add some stuffing, the rock, and the medicine cap inside the tan felt to add stability to the base.
Sew shut. Once around the base with a running stitch. Pull ends of thread to gather the felt closed and tie securely.

Final touches. Put the straight pins into your new pin cushion just like the spines on a cactus. My son helped with this, but he actually did a different project (which you can kind of see my dad assembling in the background here -- I'll have to post on that one another day).
The pincushion took us about 2 hours including set up and clean up, and the teaching time as well. My 12 year old finished a bit sooner, and the 6 year old would have taken a bit longer if we hadn't helped her a bit now and then.
Although we completed this project in one afternoon, it could easily be spread out over a few days if you preferred. My kids really stayed focused and worked well the whole time.
My mom even gave some homework (and the kids didn't even groan!):
My mom left papers with various doodles on them. Each child has one of the following: one page with straight lines, another with wavy lines, and another with a spiral.

They need to practice with the sewing machine without thread. The idea is to get comfortable with maneuvering the machine and needle by staying on the line as much as possible. They have gone through far more than those first sheets of paper she left in just a couple days. They love to practice sewing!
She also asked that they look for types of material that get used to make fabric. She gave cotton as an example, and they need to find as many others as they can before our next class. They have talked about reading clothing tags and looking online to find as many as possible. Of course, Blake has said he's going to "win" and find the most. Everything becomes a competition to him, if possible.
We had an amazing lesson, used up some of the 49 years of scraps my mom has around her house, and helped us all build some great memories together. I can't wait until next month, and neither can the kids.
Lessons learned . . .
The kids learned the value of time spent and lessons learned from grandparents, not something we get to enjoy every day.
The kids definitely learned some new sewing terms, skills, and had a productive project to fill their afternoon. (with a somewhat useful end product as well!)
Me? I appreciate more the knowledge from others who also love my kids and the benefit of tapping into it for our homeschool day. You might not have grandparents nearby that can invest this kind of time into your kids, but you might be able to "adopt" a grandparent or neighbor that can help enrich your kids' lives and enhance the breadth or depth of your school subjects.
Back in the fall my mom proposed coming out and teaching a sewing class for my kids once a month, and wondered if that would interest me. Hmmmmm. How long did I need to think before answering that one? I think I said, "yes" before she finished offering. This is one of those subjects that takes more time, energy, and knowledge than I have to put together and consistently execute for my kids.
My parents wintered down south and recently returned, ready to jump into our sewing classes. The first class far exceeded my expectations, even as well as I know my mom. I wanted to share the lesson concepts and the craft we did in case anyone else would like to start something along these lines. In the process, you will also get some of my mom's amazing frugal ideas . . .
She opened by talking about different types of fabric -- woven, knit, etc. She asked for other ideas and I was thrilled when Blake mentioned felt and could even explain the two different processes to make felt (thanks to a field trip to a sheep farm and wool shop a year and a half ago -- See? They do actually listen and learn on those trips!)
We also talked about some types of stitches, string vs. thread, and went over the project of the day -- Cactus Pincushions. These were great beginner projects and would be the perfect end to a unit study on deserts, a southwest state, or cacti (not that we were doing any of those things, just looking for different applications).
 Brooke tracing with the finished project sample on display
Supplies needed:
Green felt
Brown/tan felt
Green string (if you have brown/tan as well that could be used on the base)
Heavy cardstock (an old cereal box works well)
Scissors
Stuffing
Sewing needle
A small rock (about the size of a marshmallow)
A cap from a medicine bottle
Straight pins to put in your new pin cushion!
 Cut out the patterns for the shapes. Free hand draw a cactus (about 5 1/2 inches high) and two rectangles, one about 1-1/4" x 5" (this will be used to cut out another heavy cardstock triangle for each project) and the other about 3" x 5-3/4" (this will be traced on the tan felt).
Trace the patterns. The cactus pattern gets traced twice onto green felt, the large rectangle onto tan felt, and the smaller rectangle onto more cardstock.
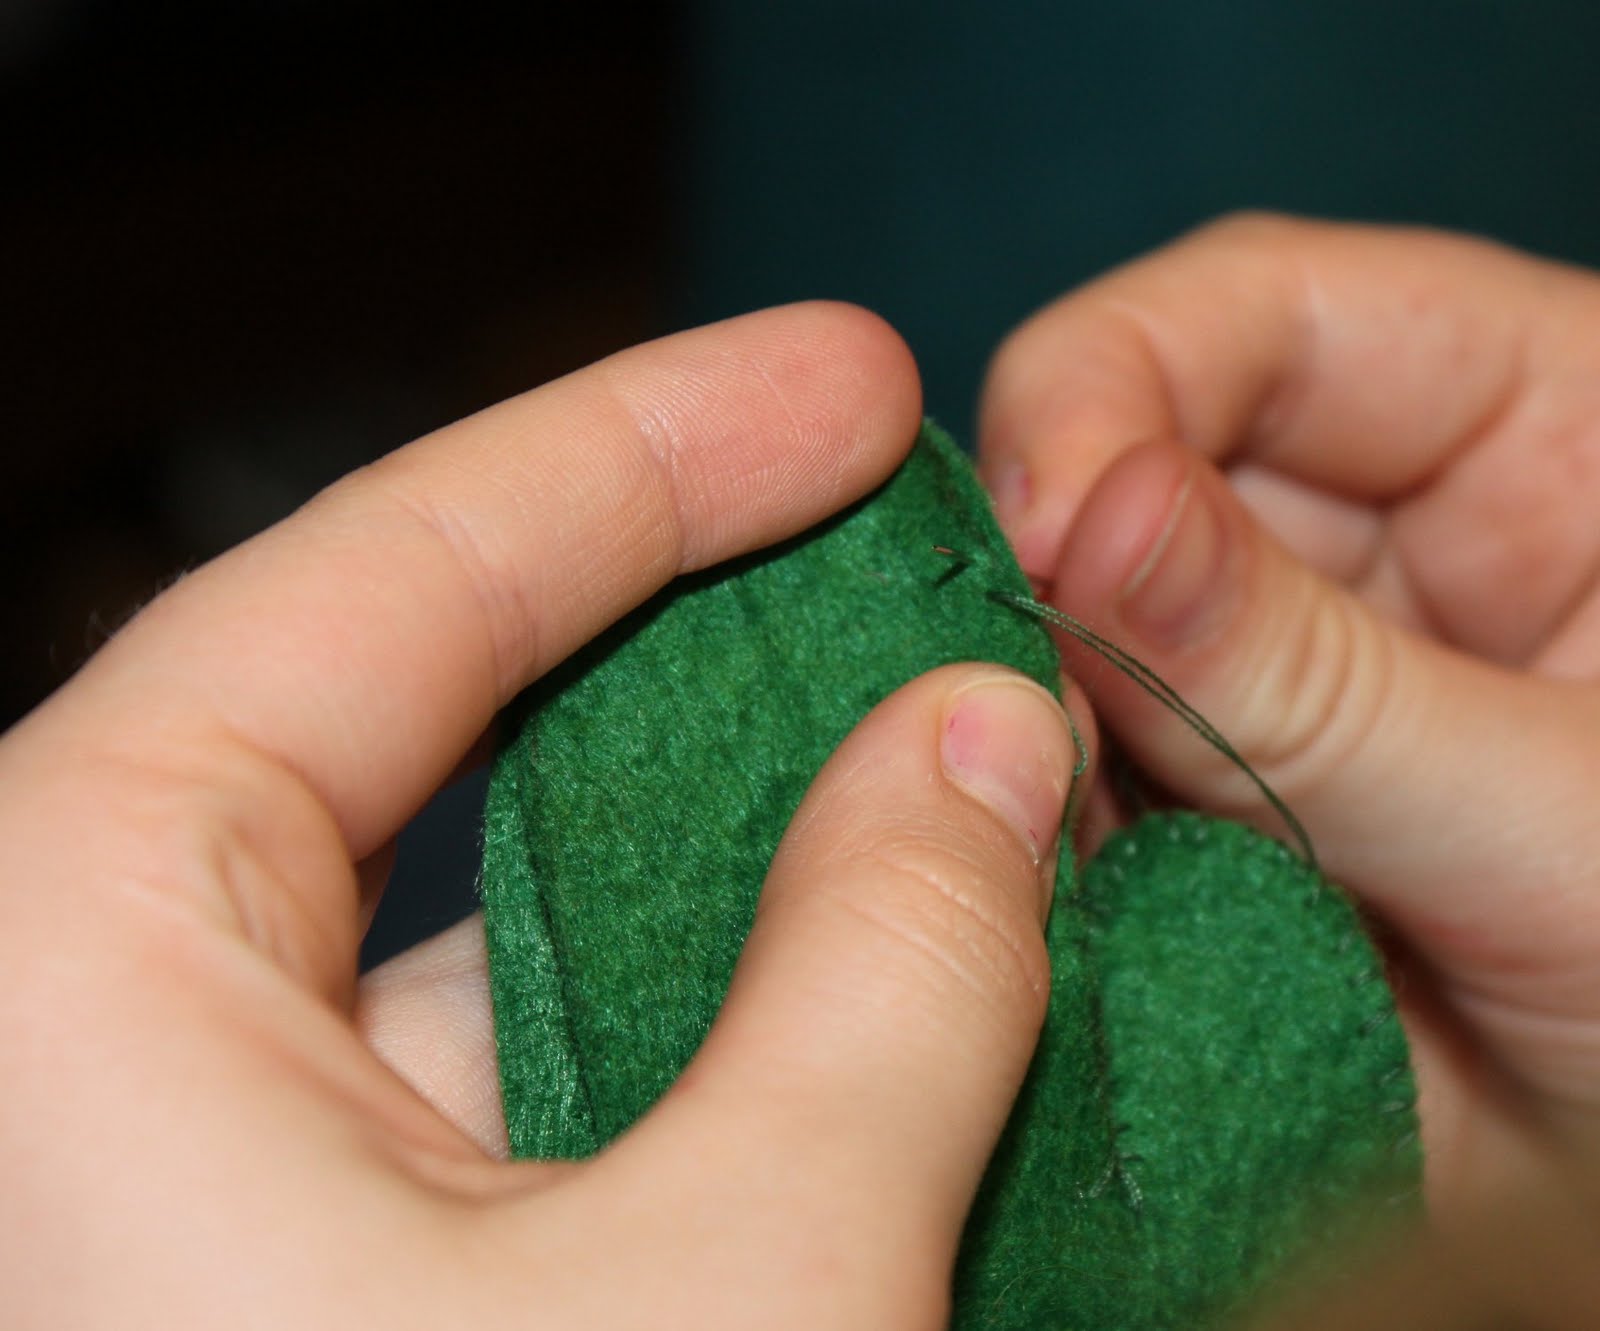
Sew cactus halves together. After cutting out the two cactus halves, they had to sew them together using a whip stitch all around the edge. This is one of the easiest stitches, that even a four year old can often accomplish with a little direction to get started. Do not sew the bottom closed.

Stuff cactus. ** Frugal tip ** My mom saves the cotton from pill and vitamin bottles! She has quite a bag full and we used this for our stuffing! The stuffing can be started when you are still only 2/3 of the way around with the stitching. That makes it a little easier to get into the arm of the cactus and all the way to the top. Stuff it firmly, but not so hard that you break the felt. We did have to touch up a couple spots from over-zealous stuffing. A pen or pencil can help to gently stuff where fingers can't quite reach.
 Sew the tan felt into a cylinder. After completing the cactus, now do another whip stitch connecting the two shorter sides of the felt rectangle.
 Gathering stitch. Then they put a running stitch along one opening of the brown tube. Put the cactus into the tube and gather/tighten the stitch like a draw string and tie in place. Then sew around the base of the cactus (whip stitch), securing it to the tan felt.
 Make the base. Once the base and cactus are connected, you flip the base right side out (like a skirt on the bottom of the cactus). Take the cardboard rectangle and shape it into a circle. Put this inside the tan cylinder to help it hold the circular shape. Add some stuffing, the rock, and the medicine cap inside the tan felt to add stability to the base.
Sew shut. Once around the base with a running stitch. Pull ends of thread to gather the felt closed and tie securely.

Final touches. Put the straight pins into your new pin cushion just like the spines on a cactus. My son helped with this, but he actually did a different project (which you can kind of see my dad assembling in the background here -- I'll have to post on that one another day).
The pincushion took us about 2 hours including set up and clean up, and the teaching time as well. My 12 year old finished a bit sooner, and the 6 year old would have taken a bit longer if we hadn't helped her a bit now and then.
Although we completed this project in one afternoon, it could easily be spread out over a few days if you preferred. My kids really stayed focused and worked well the whole time.
My mom even gave some homework (and the kids didn't even groan!):
My mom left papers with various doodles on them. Each child has one of the following: one page with straight lines, another with wavy lines, and another with a spiral.

They need to practice with the sewing machine without thread. The idea is to get comfortable with maneuvering the machine and needle by staying on the line as much as possible. They have gone through far more than those first sheets of paper she left in just a couple days. They love to practice sewing!
She also asked that they look for types of material that get used to make fabric. She gave cotton as an example, and they need to find as many others as they can before our next class. They have talked about reading clothing tags and looking online to find as many as possible. Of course, Blake has said he's going to "win" and find the most. Everything becomes a competition to him, if possible.
We had an amazing lesson, used up some of the 49 years of scraps my mom has around her house, and helped us all build some great memories together. I can't wait until next month, and neither can the kids.
Lessons learned . . .
The kids learned the value of time spent and lessons learned from grandparents, not something we get to enjoy every day.
The kids definitely learned some new sewing terms, skills, and had a productive project to fill their afternoon. (with a somewhat useful end product as well!)
Me? I appreciate more the knowledge from others who also love my kids and the benefit of tapping into it for our homeschool day. You might not have grandparents nearby that can invest this kind of time into your kids, but you might be able to "adopt" a grandparent or neighbor that can help enrich your kids' lives and enhance the breadth or depth of your school subjects.

Comments
I'm going to bookmark this... keep us updated on what projects she has them do!
amy in peru
btw, this one she pulled from a 1965 craft magazine. That would explain why I couldn't find it online to link to. :-)
~Erin